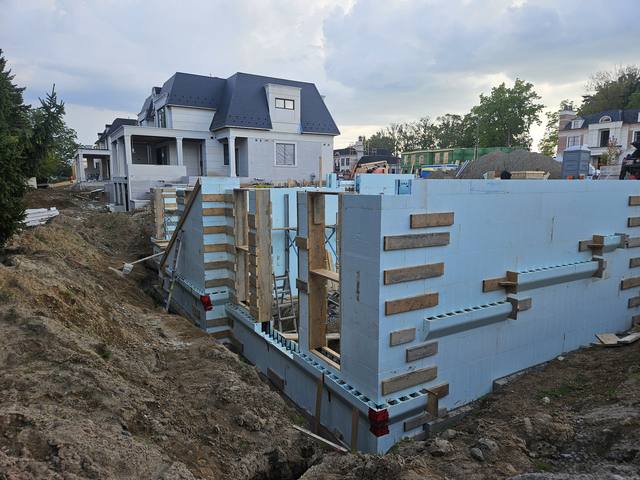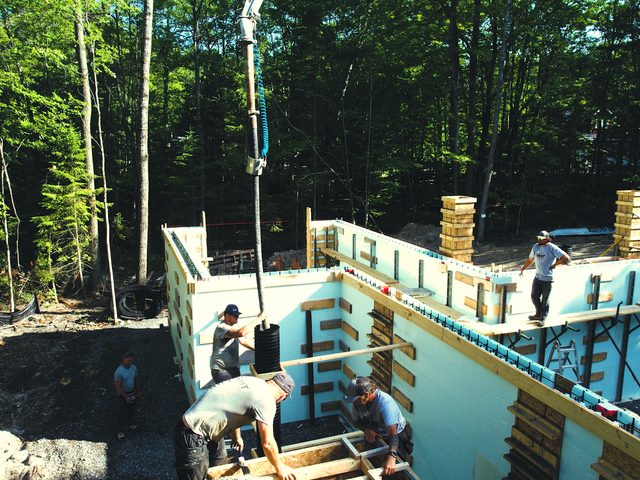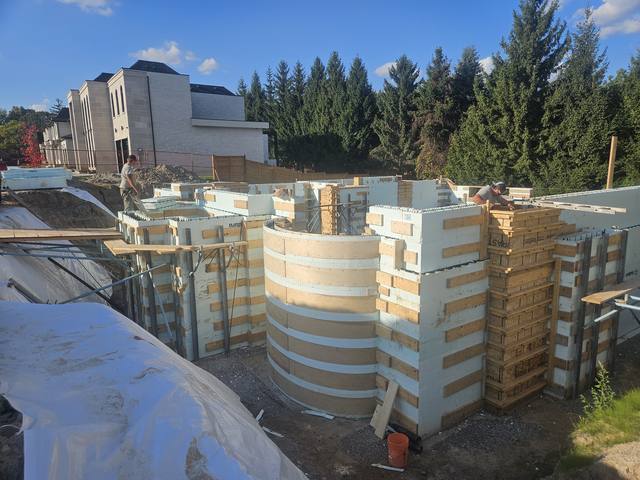
Most people picture ICF installation as the pour: the boom pump, the truck, the crew on the walk boards. The pour is the part that shows. By the time the truck is booked, though, almost everything that decides whether the wall comes out straight, square and ready to finish has already been done, one 18-inch course at a time.
This is that part, in the order it happens on site, and the reason behind each step. We use Nudura’s installation manual as the reference because it is published and anyone can check it.
The Footing Has to Be Nearly Dead Level
Nudura asks for footings within 1/4 inch of level. A conventional form crew would call that fussy. There is a reason for it.
ICF forms are not levelled on the footing. They are levelled after the second course, by shimming low spots and cutting foam where the footing is high. The flatter the footing, the less of either. Nudura calls that tolerance one of the fundamental keys to a quality build, and it is the first place a wall can start going wrong.
Two other footing details catch people out:
- The projection is measured from the concrete, not the foam. Footing width is sized off the face of the concrete inside the form, so the 2 5/8 inches of foam on each side gets added in.
- Dowels sit at the centre of the wall. They are the reinforcing connection at the joint between footing and wall. The vertical steel above does not need to be tied to them.
Where the design steps, and local code permits it, steps in 18-inch increments match the course height, so the forms lock over the step without trimming. Where the site is rock, the forms can be scribed to the stone and set on it directly, with dowels drilled into the rock. Where it suits the site, we scribe the ICF straight onto the rock and pour off that.
Course One: Lay Out From the Corners In
The first course is the layout. Get it right and every course above it follows. Nudura’s manual says plainly that extra time spent here saves cutting and form support on every course that follows.
The method:
- Start at the corners of the longest wall and work toward the middle. Any cut lands near the centre of the wall, not beside a corner, and the webs inside the forms stay lined up.
- Keep the forms tight end to end. Nudura’s manual calls for eight vertical joint clips on the first course, on both the corner and standard forms.
- Cut on the lines moulded into the foam. They keep the interlock working with the next course, and they hold the overall wall dimensions to within about an inch.
- Keep the cavity clean. Dirt, debris and the foam fray from cutting all end up in the concrete if nobody clears them.
The webs are the reason for most of this. They sit every 8 inches, and they are the fastening strips the drywall and siding screw into. A wall laid out from the corners keeps a fastening line every 8 inches from footing to top. A wall laid out from wherever the installer happened to start does not.
When a cut leaves more than 4 inches of foam hanging past the last web, that panel needs extra support before the concrete goes in. It gets fibre tape run through from one panel to the other, or short lengths of strapping screwed across the fastening strips on both faces.
Course Two: Reverse the Corners, Then Level
The second course starts at the same corner as the first. Each corner form is turned around, which puts its joint 16 inches past the joint below. That offset is built into the corner piece. It is how the courses bond, the same way a bricklayer staggers joints.
Nudura wants at least 8 inches of stagger between vertical joints anywhere in the wall. Less than that and the joint needs extra support: sheathing or 1x4 strapping screwed to the fastening strips. The forms press down until the interlock snaps, and a rubber mallet makes sure it is seated. The horizontal steel goes in, and a row of form lock goes into the cavity to hold the wall straight.
Then the wall gets levelled, and this is the step people do not expect. The forms bridge over the low spots in the footing and ride on the high ones. With a laser or a builder’s level, the crew shims under the lows and cuts foam off the highs, usually some of both. Filling a hollow is easier than cutting a high spot, which is one more reason the footing tolerance matters.
Once it is level, the bottom course is fixed to the footing. Nudura’s recommendation is low-expansion spray foam, which sets in about 15 minutes and is fully cured in 24 hours, so the crew keeps stacking while it goes off.
Doing this at course two is deliberate. The footing can be checked beforehand, but Nudura’s manual says the best method is to correct it once two courses are on. Every course after this one inherits the result.
Every Course After That Is a Copy
From course three up, the wall repeats. Every odd course is stacked the same way as course one, and every even course the same as course two: the same cuts, the same steel positions, the same splice laps. A vertical stack joint, where a plan forced one, runs the full height of the wall.
That is why the first two courses matter so much. A mistake in course one is a mistake in courses three, five and seven.
The places that get extra support on every course are predictable:
- a cut end with more than 4 inches of foam past a web
- a joint with less than 8 inches of stagger, or a cut beside a corner
- the main-wall side of a T-wall, where a second wall meets it
- a window or door near a corner
The Steel Goes In as the Wall Rises
Steel is not dropped in at the end. Horizontal bars go in after every course, clipped into notches moulded into the tops of the webs. Each course’s bar sits one notch over from the bar below it. That alternating pattern builds a cage that holds the vertical bars in line later.
Below grade, the horizontal steel goes on the tension side of the wall. Above grade it sits in the centre.
Bars arrive in 20-foot lengths, so almost every wall needs splices, and splice length is where the manual is most specific. It works the lap for a 10M bar at 60 bar diameters: 678 millimetres, about 27 inches of overlap. The two bars do not have to touch. Citing CSA A23.3, it allows a gap of up to a fifth of the lap length, to a maximum of 6 inches, with no tie wire.
The vertical steel goes in last, once the wall is at full height and a final row of form lock is in to hold it straight. The crew starts at the corner where the pour will start and weaves each bar down between the alternating horizontals, which locks it in place. Bars smaller than 15M sit against the webs, and the concrete pushes them tight against the webs as it fills.
The sizes and spacing come from the design tables or the engineer, not from the installer. We build to the stamp, and anything on site that does not match the drawings gets flagged, not improvised.
Openings, Sleeves and Pockets Are Built In
In an ICF wall, a window is not cut out of a finished wall. It is framed into the forms as they go up, with a buck: a frame of lumber, vinyl or a composite that holds the concrete back until it cures. We form bucks, beam pockets and service penetrations in as the wall rises, rather than cutting them in later.
A few details from the manual that decide whether the window fits:
- For a buck that stays in place, the rough opening is the inside of the buck. Size it with the buck’s own thickness allowed for.
- The sill stays open. Concrete has to be placed and screeded under the window, so the sill is left open or has access holes cut in it.
- Each opening gets its own steel. Two 10M bars run vertically on each side, and two run horizontally at the sill, 24 inches into the solid wall. The lintel steel above follows the lintel schedule on the drawings.
- A corner within 8 feet of an opening is tied back to the buck or braced from outside. Nudura requires support at any corner that close.
Service penetrations get the same thinking in advance. Each sleeve is cut through the foam where the trade needs it, at the elevation and slope a drain line needs. If a sleeve lands on a web, it moves to one side instead of cutting the web. A sleeve bigger than 16 by 16 inches needs steel added around it. Each sleeve runs long enough past the wall for the trade to put a coupler on later without digging into the foam.
Alignment Goes On Before the Concrete Does
Before the pour, the wall gets its alignment system: vertical channels screwed to the fastening strips, adjustable braces anchored to the ground, and a catwalk platform with guard rails. Nudura spaces them 5 feet 4 inches apart on one side of the wall, with extra braces beside openings. The screws are left snug, not tight, so the forms can slide in the channel while the wall is straightened.
We put Giraffe bracing and alignment scaffold on every wall. Why a brace works this way, and when it can come off, is its own subject: see insulated concrete form bracing.
The Check Before the Truck
Nudura publishes a pre-placement checklist, and it reads like a list of every phone call nobody wants to make on pour day. The parts that belong to installation:
- Is the wall built to the drawing, with the rough openings at the right size?
- Is all the extra form support in?
- Is the steel, including the lintel steel, where the plans put it?
- Are the bucks anchored, the sleeves in and the beam pockets set?
- Are the string lines up and the walls straightened?
- In winter, has the cavity been kept clear of snow and ice overnight?
- Are blow-out kits ready: plywood squares or stakes, screws and a screw gun?
Then the concrete goes in, in lifts. Per CSA A23.1 and ACI 304, as the manual cites them, the rate is no more than 4 feet of lift per hour. What happens from there is pour day.
How We Install It
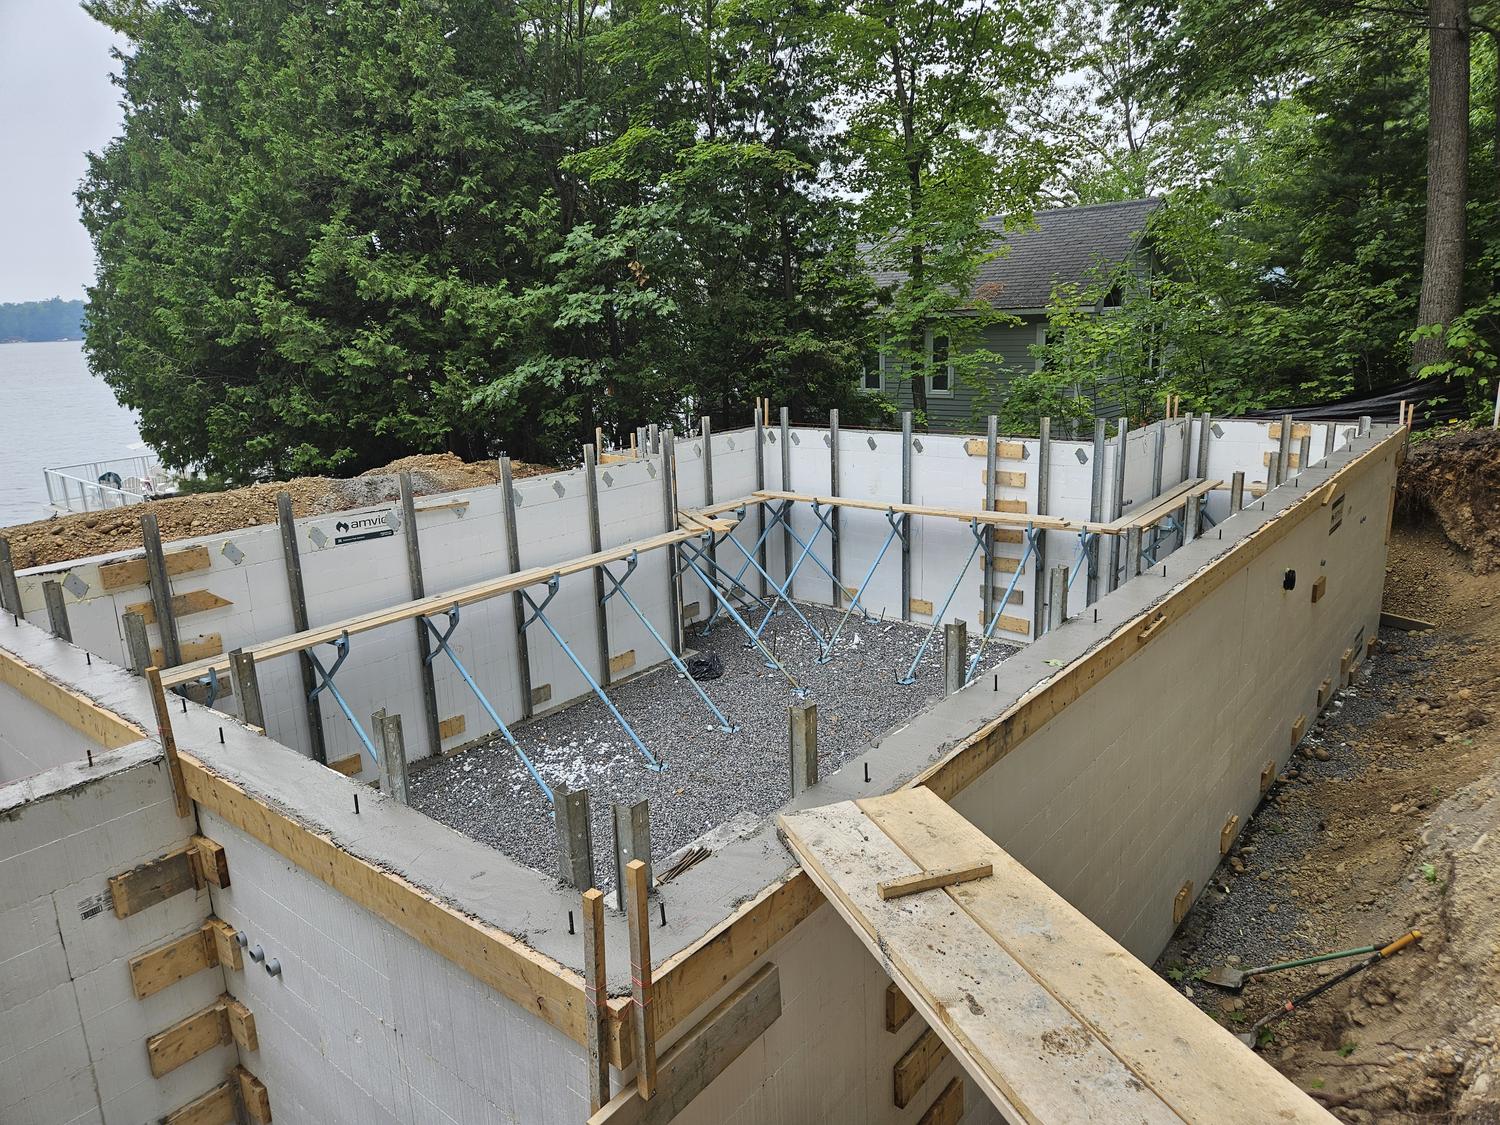
Our own crews self-perform the concrete scope: footings, walls and waterproofing. Drainage, meaning the weeper and interior stone, goes in before the walls go up. Then the walls are set, braced, aligned and poured in controlled lifts, checked as we go. The reason we check every lift is the one on our foundations page: every trade after us inherits whatever we leave behind.
We are certified installers across Nudura, Amvic, Element and Fox. You pick the system, and we install it. Before we mobilize, we need drawings and permits. If you have them, send them with your quote request and we will tell you how your wall goes up.